
In modern Java development, flexibility is vital. Every organization needs to grow, and in software development, growth means releasing features with speed and efficiency. We think Spring Boot and Angular are two great tools to help you achieve those goals. But you also need to ensure that your features are ready for production and safe to release to your customers. Enter feature flags.
In this tutorial, you’ll build a basic CRUD app Spring Boot and Angular to get comfortable with these technologies. You’ll also pull in feature flags with Split so that you can release features to production quickly and safely.
Deploy Continuously with Confidence – Sign up for a Split demo!

Speed up development cycles, reduce release risk, and focus your team on DevOps best practices that create maximum impact. Get a personalized demo today!
Spring Boot and Angular Prerequisites
For today, you’ll want to confirm that you have the following set up:
- Install Node and npm
- Install the Angular CLI for Angular 9 with
npm install -g @angular/cli@^9 - Sign up for a free developer account with Split
Why Feature Flags?
At its simplest, a feature flag is a runtime mechanism that allows you to choose between different code paths in your system.
Feature flags can allow you to test in production and do away with your costly staging environment, increase developer efficiency and reduce engineering cycles by truly implementing continuous deployment, and begin to build a culture of experimentation across your product and engineering teams.
Get Started With Spring Boot
For this project, you’ll use Spring Initializr to get your application started. In the image below, I’ve selected a Gradle project using Java 8 and Spring Boot 2.3.1 as well as the Web, JPA, and H2 starters.
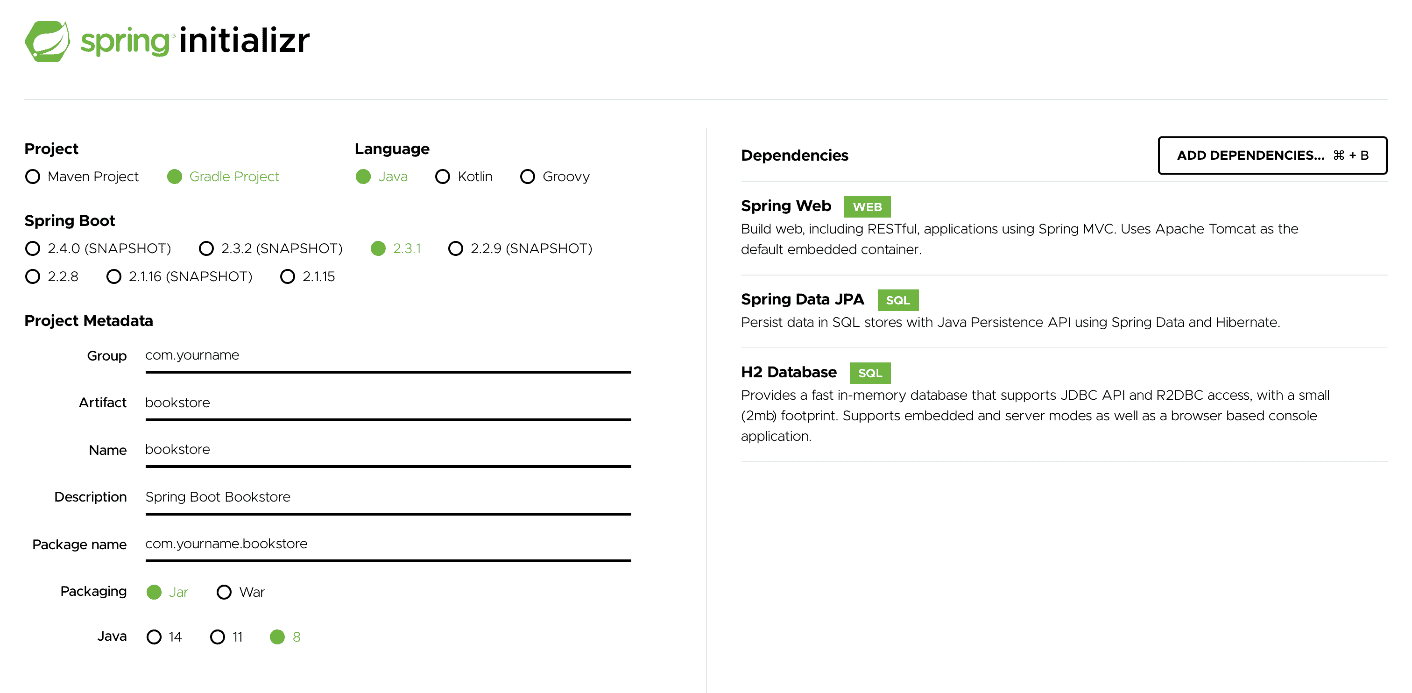
Spring Initializr will create a .zip file with your application. Take the .zip file and expand it in your standard working directory. (For me, this is ~/workspace.) Then, unzip the file and import the Gradle project into your favorite IDE. I’ll be using IntelliJ today, but you’re welcome to use whatever tool you’re most comfortable with.
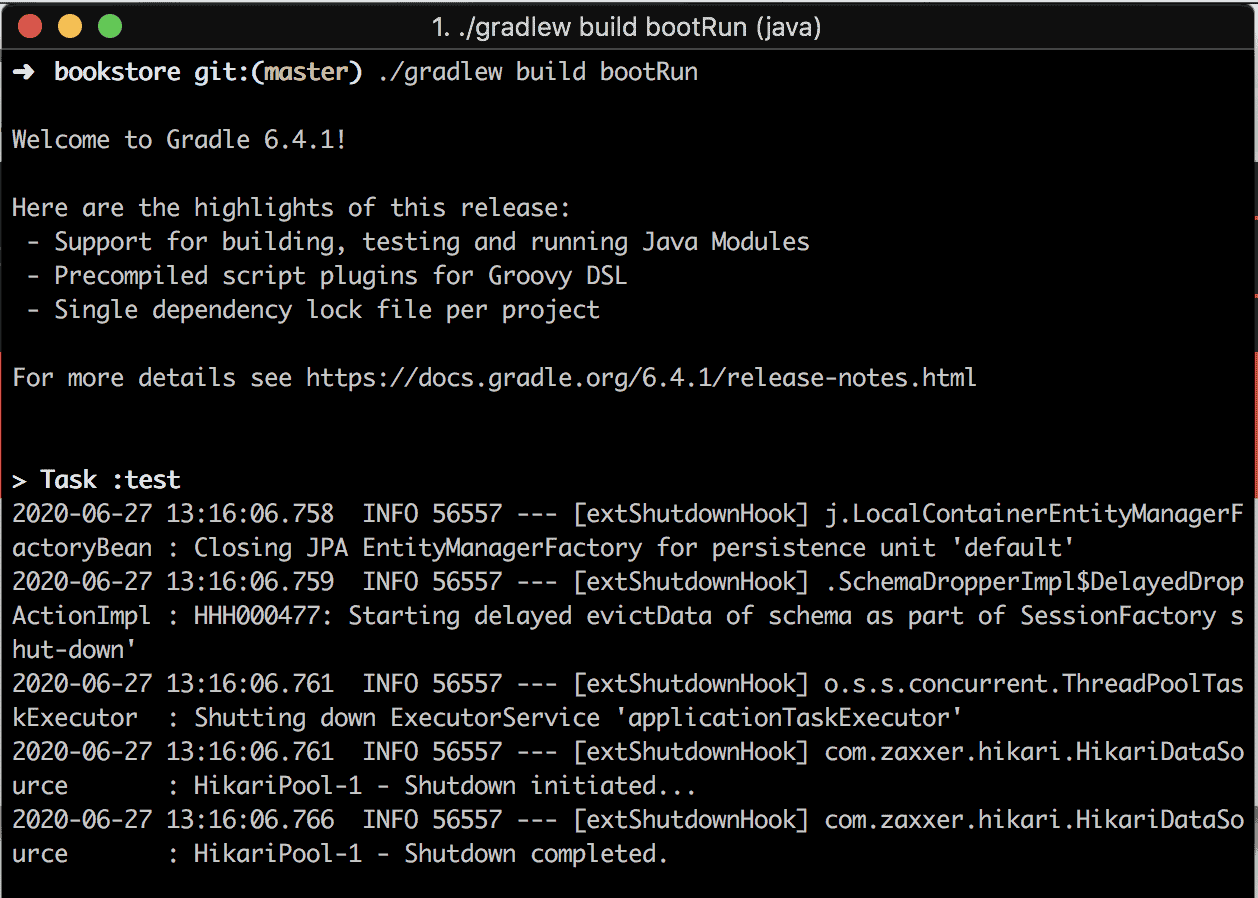
And then, once everything looks ready, navigate to the root project folder and run the command below. It’ll build your project, run the one default test, and then start up the application. Once it starts successfully, you can go ahead and end the process by clicking Ctrl+C or whatever your operating system requires.
./gradlew build bootRunAs you can see in the image below, we’ve built and started the project.
Now let’s build out our API, adding a few REST endpoints in the process.
**NOTE**: You’ll be working `outside-in` with the code below. This means that dependent classes are defined further down.
First, our BookController.java will connect directly to the repository. Normally we have some sort of service layer between the two, as well as some error handling. But for now, let’s keep things simple.
@RestController
@CrossOrigin(origins = "http://localhost:4200") //since we’re just working locally
public class BookController {

    BookRepository bookRepository;

    public BookController(BookRepository bookRepository) {

        this.bookRepository = bookRepository;
    }

    @GetMapping("/books/")
    public Iterable<Book> getBooks() {
        return bookRepository.findAll();
    }

    @GetMapping("/books/{id}")
    public Book getBook(@PathVariable("id") Long id) {
        return bookRepository.findById(id).get();
    }

    @PostMapping("/books/")
    public HttpStatus addBook(@RequestBody Book book){
        bookRepository.save(book);

        return HttpStatus.CREATED;
    }

}Code language: Java (java)
Next, our repository will be a simple Spring JPA interface. We don’t need any custom logic here at all.
public interface BookRepository extends CrudRepository<Book, Long> {
}Code language: Java (java)
And finally, let’s add a Book class that defines our entity.
@Entity
@Table(name = "book")
public class Book {

    @Id
    @GeneratedValue(strategy = GenerationType.AUTO)
    private Long id;

    private String title;

    private String author;

    public Book() {

    }

    public Book(Long id, String title, String author) {

        this.id = id;
        this.title = title;
        this.author = author;
    }

    public Long getId() {
        return id;
    }

    public void setId(Long id) {
        this.id = id;
    }

    public String getTitle() {
        return title;
    }

    public void setTitle(String title) {
        this.title = title;
    }

    public String getAuthor() {
        return author;
    }

    public void setAuthor(String author) {
        this.author = author;
    }
}Code language: Arduino (arduino)
To populate a few starter books, add the following into your BookstoreApplication.java
@Bean
ApplicationRunner init(BookRepository repository) {
// Save our starter set of books
return args -> {
Stream.of(new Book(null, "Horton Hears a Who", "Dr. Seuss"), new Book(null, "A Brief History of Time", "Stephen Hawking"),
new Book(null, "Brave New World", "Aldous Huxley")).forEach(book -> {
repository.save(book);
});
//retrieve them all, and print so that we see everything is wired up correctly
repository.findAll().forEach(System.out::println);
};
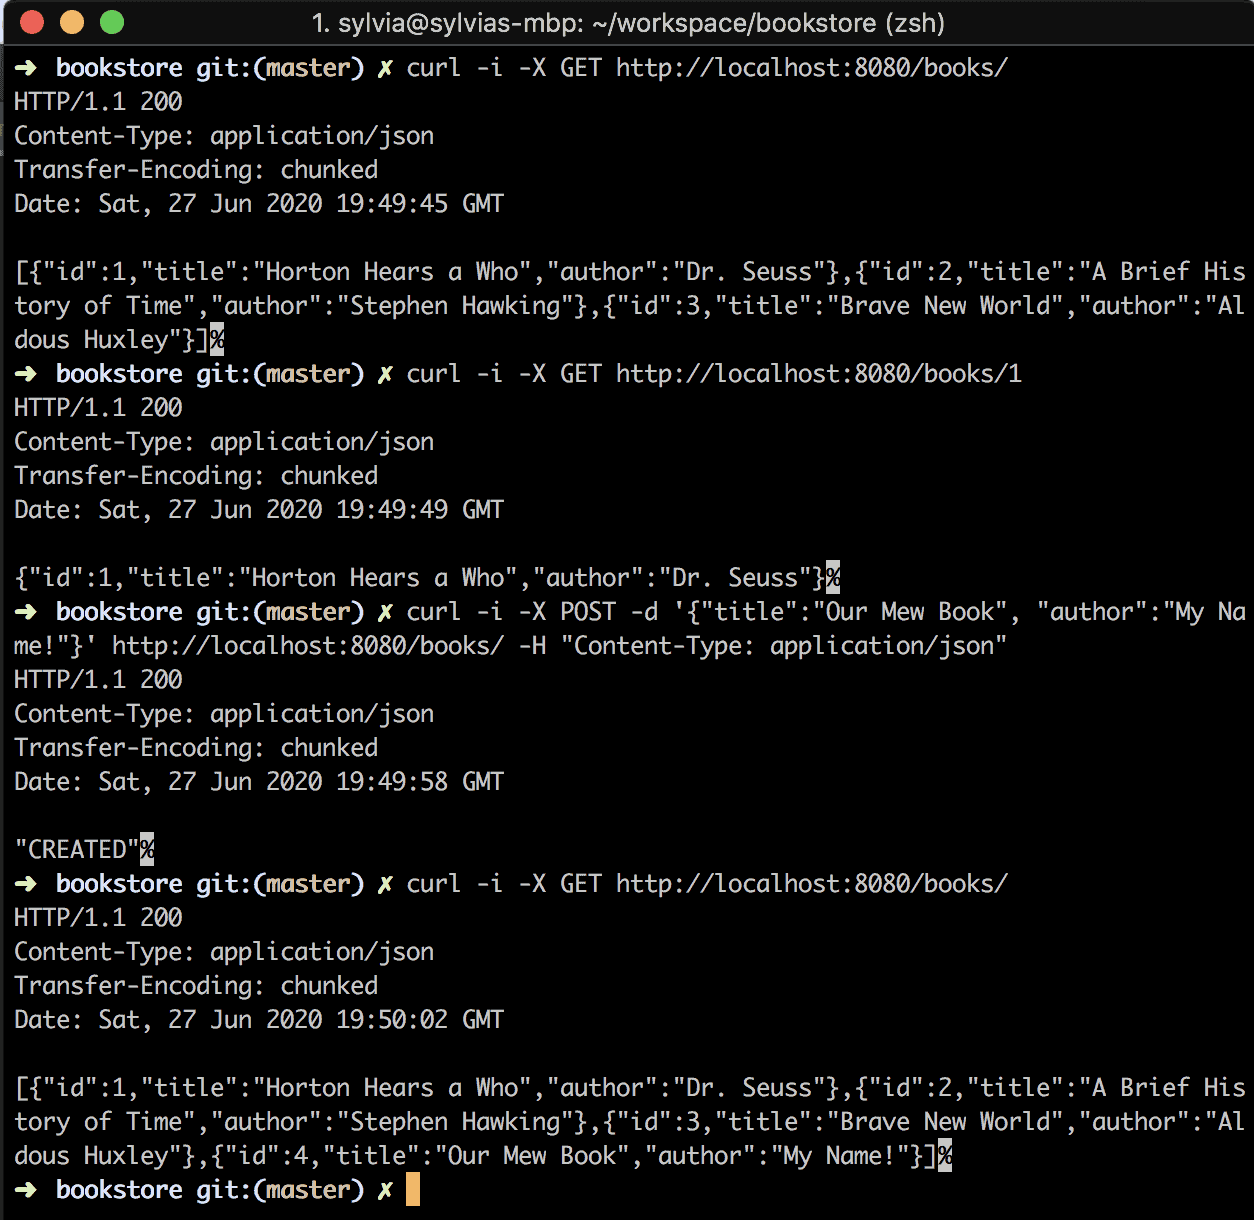
}Code language: PHP (php)Now you can run the application again and test some of the new endpoints out. You can run the following commands in curl to test each of the endpoints.
# run the app
./gradlew bootRun

# get all the books
curl -i -X GET http://localhost:8080/books/

# get one book
curl -i -X GET http://localhost:8080/books/1

# add a new book
curl -i -X POST -d '{"title":"Our Mew Book", "author":"My Name!"}' http://localhost:8080/books/ -H "Content-Type: application/json"

# get all books again to verify
curl -i -X GET http://localhost:8080/books/Code language: Gherkin (gherkin)
And here are the results you can expect to see from calling the endpoints.
Now that you’ve got your back-end APIs all set up let’s move on. Next, you’ll get to pull Angular into the mix and create a UI.
Add Angular to Your Spring Boot App
For the Angular app, you’re going to embed your code within your Spring Boot project. You’ll also create a basic app component that lists all your books, plus you’ll incorporate an add-book component that’ll allow you to add new books in a simple form.
To kick it off, create a directory called webapp inside your src/main/resources folder that’ll hold your Angular application. From the terminal, go to your new webapp directory to get started with the Angular CLI.
Base Angular Setup
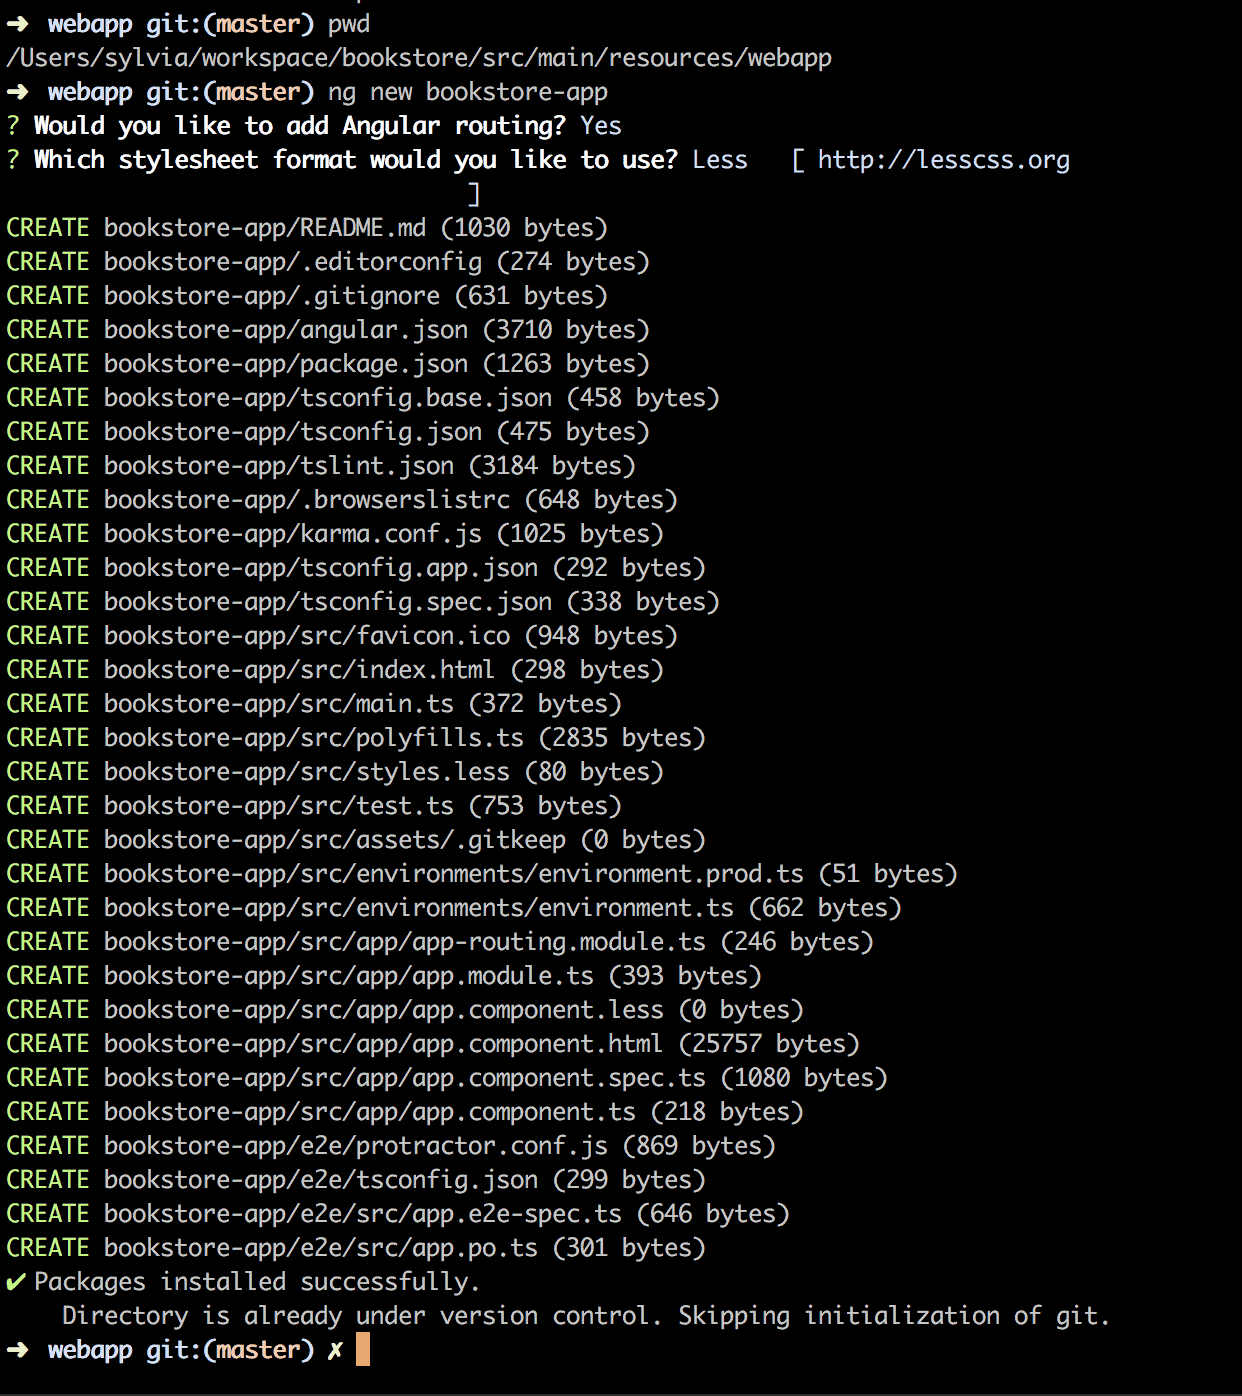
As long as you’ve installed your Angular CLI, you can now create an Angular app with the command below.
ng new bookstore-appCode language: Arduino (arduino)When you execute the ng new bookstore-app command, it’ll ask you if you want to add routing. Answer yes to this question. Next, it’ll ask what CSS library you’d like to use. You can use whichever works best for you. We won’t be doing any CSS in this tutorial. The output should look something like the following image.
Next, you’ll want to run the Angular app to make sure everything’s in place. You can do that from your bookstore-app directory with the following command:
ng serveThen you can go to http://localhost:4200/ to see the default start page.
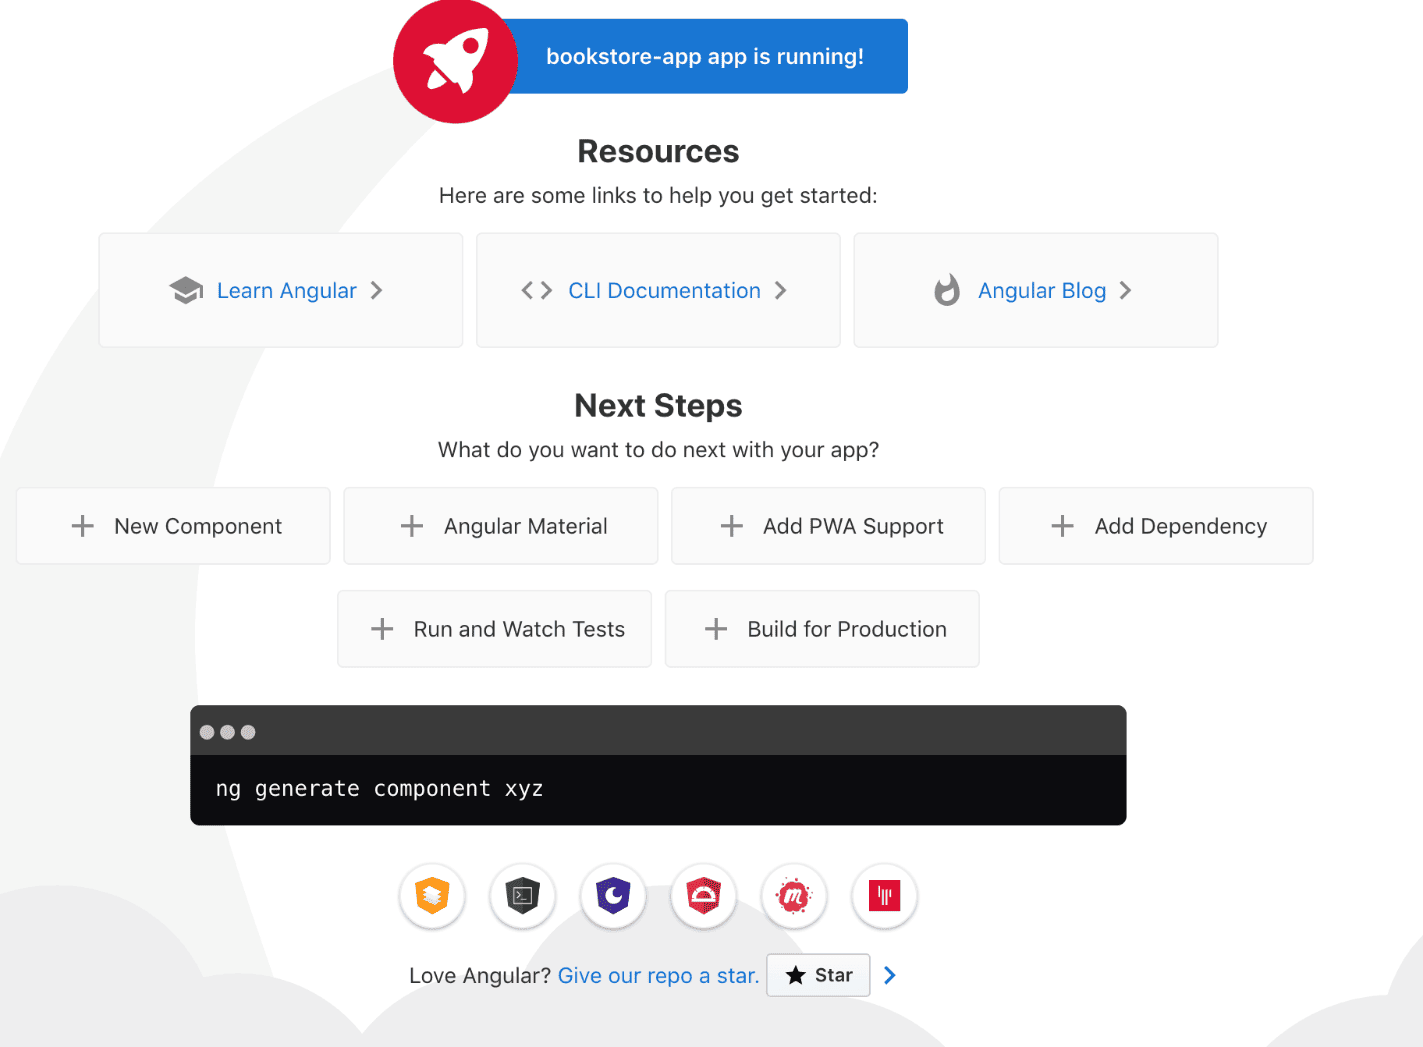
If the page comes up, you’re ready to go to the next step.
Now, let’s create the skeleton of a component that will add new books.
ng g component book/add-bookCode language: C# (cs)This will generate a CSS file, an HTML file, a TypeScript file, and a spec file for tests.
Now that all your files are generated, you can move on to the next step and start adding some code!
App Component
In your main app component, you’ll want to display the books that come back from your Spring Boot APIs.To lay some groundwork, you’ll want a Book.ts file that defines the fields in your book. I’ve put this in the base of the book directory.
export class Book {
  id: number;
  title: string;
  author: string;
}Code language: CSS (css)
And you’ll also need a BookService class inside a file named book-service.service.ts. This service class makes the calls to the Spring Boot APIs.
import {Injectable} from '@angular/core';
import {HttpClient} from '@angular/common/http';
import {Observable} from 'rxjs';

@Injectable({
  providedIn: 'root'
})
export class BookService {

  private url = 'http://localhost:8080/books/';

  constructor(private http: HttpClient) {
  }

  getBooks(): Observable<any> {
    return this.http.get(`${this.url}`);
  }

  addBook(book: Object): Observable<Object> {
    return this.http.post(`${this.url}`, book);
  }

  deleteBook(id: number): Observable<any> {
    return this.http.delete(`${this.url}/${id}`, {responseType: 'text'});
  }
}Code language: JavaScript (javascript)
For your next step, start by modifying the basic app.component.html page that will list the books by replacing the code with this.
<div align='center'><h1>Bookstore CRUD with Angular</h1></div>

<div>
  <table class="table" style="width: 80%">
    <tr>
      <th>Title</th>
      <th>Author</th>
      <th></th>
    </tr>
    <tr *ngFor="let book of books">
      <td>
        {{book.title}}
      </td>
      <td>
        {{book.author}}
      </td>
    </tr>
  </table>
</div>
<div>
  <p>
    <button (click)="addBook()"> Add Book</button>
  </p>
</div>
<router-outlet></router-outlet>Code language: Django (django)
And then replace the logic in app.component.ts.
import {Component, OnInit} from '@angular/core';
import {Book} from './book/book';
import {BookService} from './book/book-service.service';
import {Router} from "@angular/router";

@Component({
  selector: 'app-root',
  templateUrl: './app.component.html',
  styleUrls: ['./app.component.less']
})
export class AppComponent implements OnInit {
  title = 'BookStore';
  books: Book[];

  constructor(private router: Router, private bookService: BookService) {
  }

  getBooks() {
    this.bookService.getBooks().subscribe(data => {
      this.books = data;
    });
  }

  addBook(): void {
    this.router.navigate(['add-book'])
      .then((e) => {
        if (e) {
          console.log("Navigation is successful!");
        } else {
          console.log("Navigation has failed!");
        }
      });
  };

  ngOnInit(): void {
    this.router.events.subscribe(value => {
      this.getBooks();
    });
  }
}Code language: JavaScript (javascript)
To help route requests to the appropriate components, we’ll replace the code in app-routing.module.ts.
import {NgModule} from '@angular/core';
import {RouterModule, Routes} from '@angular/router';
import {AddBookComponent} from "./book/add-book/add-book.component";

const routes: Routes = [
  {path: 'list-books', redirectTo: '/', pathMatch: 'full'},
  {path: 'add-book', component: AddBookComponent},
];

@NgModule({
  imports: [RouterModule.forRoot(routes)],
  exports: [RouterModule]
})
export class AppRoutingModule {
}Code language: JavaScript (javascript)
And to round out our general app components, let’s set up our app.module.ts to include all the components we need.
import {BrowserModule} from '@angular/platform-browser';
import {NgModule} from '@angular/core';

import {AppRoutingModule} from './app-routing.module';
import {AppComponent} from './app.component';
import {HttpClientModule} from "@angular/common/http";
import {AddBookComponent} from "./book/add-book/add-book.component";
import {ReactiveFormsModule} from "@angular/forms";

@NgModule({
  declarations: [
    AppComponent,
    AddBookComponent
  ],
  imports: [
    BrowserModule,
    AppRoutingModule,
    HttpClientModule,
    ReactiveFormsModule
  ],
  providers: [],
  bootstrap: [AppComponent]
})
export class AppModule {
}Code language: JavaScript (javascript)
Now that that’s finished, you’ve probably noticed we’re still missing a few files.
Add a Book Component in Angular
To add new books, we’ll need a simple form in our add-book.component.html file.
<div class="col-md-6 user-container">
  <h2 class="text-center">Add Book</h2>
  <form [formGroup]="addForm" (ngSubmit)="onSubmit()">
    <div class="form-group">
      <label for="title">Title:</label>
      <input type="text" formControlName="title" placeholder="title" name="title" class="form-control"
             id="title">
    </div>
    <br/>

    <div class="form-group">
      <label for="author">Author:</label>
      <input type="author" formControlName="author" placeholder="author" name="author" class="form-control"
             id="author">
    </div>

    <br/>
    <button class="btn btn-success">Add</button>
  </form>
</div>Code language: JavaScript (javascript)
And then for the logic, replace the code in add-book.component.ts.
import {Component, OnInit} from '@angular/core';
import {FormBuilder, FormGroup, Validators} from "@angular/forms";
import {Router} from "@angular/router";
import {BookService} from "../book-service.service";

@Component({
  selector: 'app-add-book',
  templateUrl: './add-book.component.html',
  styleUrls: ['./add-book.component.less']
})
export class AddBookComponent implements OnInit {

  constructor(private formBuilder: FormBuilder, private router: Router, private bookService: BookService) {
  }

  addForm: FormGroup;

  ngOnInit() {
    this.addForm = this.formBuilder.group({
      id: [],
      title: ['', Validators.required],
      author: ['', Validators.required]
    });

  }

  onSubmit() {
    this.bookService.addBook(this.addForm.value)
      .subscribe(data => {
        this.router.navigate(['list-books']);
      });
  }

}Code language: JavaScript (javascript)
And now, let’s take this application out for a spin.
Start both your Spring Boot app and your Angular app.
# Start Spring Boot in one terminal
./gradlew bootRun
# And start Angular in another
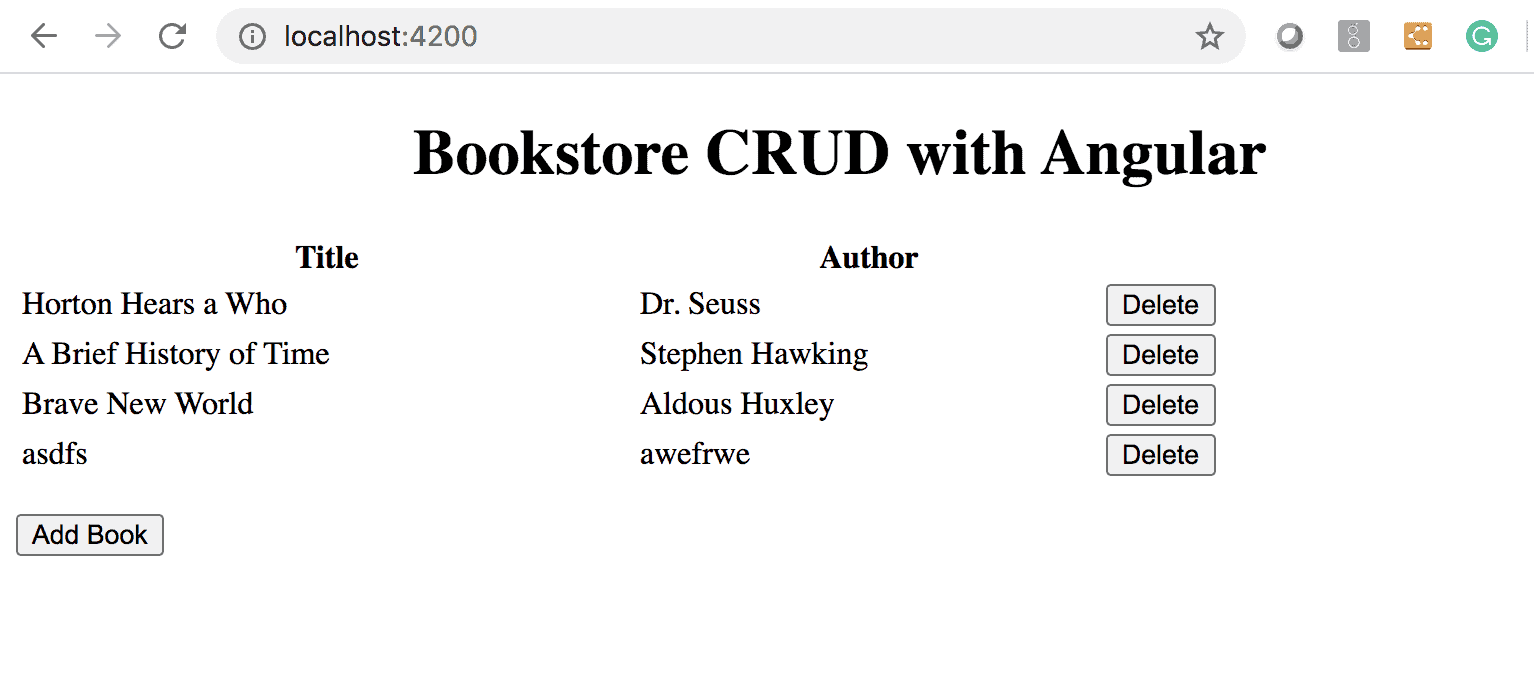
ng serveCode language: Bash (bash)If you’ve got everything wired up, you should see a screen that looks like the following image.
And if you click the “Add Book” button, you’ll see the form where you can add a new book.

You’ve now gotten most of your CRUD app done. Let’s move on to the next step.
Incorporate Feature Flags to Your Spring Boot + Angular App
So now, you’ll add the ability to delete books to your application. You’ll use our Split treatments so that you can turn those new features on and off.
You’ll start on the API side in the next section.
Add a Delete Endpoint With Release Toggle
Now you can add the ability to delete books. In this tutorial, you’ll add it behind a feature flag.
Spring Boot + Split Setup
First, add Split to your project by incorporating the Split SDK to your build.gradle file and then refreshing your Gradle dependencies.
Add the following line to your build.gradle file underneath the existing implementation lines:
implementation 'io.split.client:java-client:3.3.3'Code language: Delphi (delphi)Next, create a bean that instantiates a SplitClient. I’ve done this in the BookstoreApplication class.
    @Value("${split.io.api.key}")
    private String splitApiKey;

    @Bean
    public SplitClient splitClient() throws Exception {
        SplitClientConfig config = SplitClientConfig.builder()
                .setBlockUntilReadyTimeout(10000)
                .enableDebug()
                .build();

        SplitFactory splitFactory = SplitFactoryBuilder.build(splitApiKey, config);
        SplitClient client = splitFactory.client();
        client.blockUntilReady();

        return client;
    }Code language: Arduino (arduino)
Additionally, you’ll need a SplitWrapper to call your Split Client easily.
@Component
public class SplitWrapper {
    @Value("${split.io.api.key}")
    private String splitApiKey;
    private final SplitClient splitClient;

    public SplitWrapper(SplitClient splitClient) {
        this.splitClient = splitClient;
    }

    public boolean isTreatmentOn(String treatmentName) {
        String treatment = splitClient.getTreatment(splitApiKey, treatmentName);
        if (treatment.equals("on")) {
            return true;
        } else if (treatment.equals("off")) {
            return false;
        } else {
            throw new RuntimeException("Error retrieving treatment from Split.io");
        }
    }
}Code language: Arduino (arduino)
Next, add your Split API key to your applications.properties file.
To find your API key, head over to your Split dashboard at split.io and click on the workspace button on the top left. Then go to “Admin Settings” and click on “API Keys.” There you’ll see keys for each environment and type of key. Copy the SDK key for staging and put it in your application.properties file.
split.io.api.key=YOUR_STAGING_SDK_KEYCode language: Swift (swift)Add a Delete Endpoint in Spring Boot
Next, you can add your delete endpoint to your BookController. You’ll also add a SplitWrapper reference that is auto-wired into the controller.
//...
public class BookController {
    // Add SplitWrapper as a field and in your constructor and then add your new endpoint

    SplitWrapper splitWrapper;
    BookRepository bookRepository;

    public BookController(BookRepository bookRepository, SplitWrapper splitWrapper) {
        this.bookRepository = bookRepository;
        this.splitWrapper = splitWrapper;
    }

   //...

    @DeleteMapping("/books/{id}")
    public HttpStatus deleteBook(@PathVariable("id") Long id) {
        if (splitWrapper.isTreatmentOn("allow-delete")) {
            bookRepository.deleteById(id);

            return HttpStatus.OK;
        } else {
            return HttpStatus.NOT_FOUND;
        }
    }
}Code language: Java (java)
You can then test the endpoint using curl as we did for other examples above.
Angular + Split Setup
Next, you’ll add Split to the front-end web app.
To start, add the Split SDK to your dependencies in your package.json file, and run npm install to pull in the library.
Add the following line to the dependencies section of the package.json file:
"@splitsoftware/splitio": "^10.11.1",Code language: Bash (bash)And add a splitio.service.ts file with the following code.
import { Injectable } from '@angular/core';
import { SplitFactory } from '@splitsoftware/splitio';
import { fromEvent } from 'rxjs';

@Injectable({
  providedIn: 'root'
})
export class SplitioService {
  splitio: SplitIO.ISDK;
  splitClient: SplitIO.IClient;
  isReady = false;
  treatments: SplitIO.Treatments;
  features: string[] = [
    'allow_delete'
  ];

  constructor() { }

  initSdk(): void {
    this.splitio = SplitFactory({
      core: {
        authorizationKey: 'localhost',
        key: 'customer-key'
      },
      // In non-localhost mode, this map is ignored.
      features: {
        allow_delete: 'off'
      }
    });

    this.splitClient = this.splitio.client();

    this.verifyReady();
  }

  private verifyReady(): void {
    const isReadyEvent = fromEvent(this.splitClient, this.splitClient.Event.SDK_READY);

    const subscription = isReadyEvent.subscribe({
      next() {
        this.isReady = true;
        console.log('Sdk ready: ', this.isReady);
      },
      error(err) {
        console.log('Sdk error: ', err);
        this.isReady = false;
      }
    });
  }

  getTreatments(): void {
    this.treatments = this.splitClient.getTreatments(this.features);
  }

}Code language: JavaScript (javascript)
To instantiate the Split SDK, add the following to your app.component.ts file.
// …

// -- Add a Delete Book function and deleteAllowed function to support your new HTML
deleteBook(book) { this.bookService.deleteBook(book.id); this.router.navigate(['list-books']); }

deleteAllowed() { return this.splitIoService.isTreatmentOn('allow-delete'); }

  ngOnInit(): void {
    this.router.events.subscribe(value => {
      this.getBooks();
    });
    this.splitioService.initSdk(); // <-- Add This Line
  }


// ...Code language: JavaScript (javascript)
And in the app.component.html file, we can add a button to delete a book on each row of our table.
      <td>
       <div *ngIf="deleteAllowed()"> <button  type="button" (click)="deleteBook(book)">Delete</button></div>
      </td>Code language: Django (django)
Once everything is wired up and you enable your split treatment in the Split site, you’ll see the “Delete” button appear on your table.
Now you’ve got the start of a CRUD app using Angular and Spring Boot.
Learn More About Spring Boot, Angular, Testing with Feature Flags, and More
Excited to build more apps with Spring Boot and Angular? Check out these tutorials!
- Monitor Your Java Application with New Relic
- Build a Web App with Spring Boot in 15 Minutes
- Easily Set Up Smoke Tests in Your Build Pipeline
- Set Up Feature Flags with React in 10 Minutes
- Build Beautiful Angular Apps with Bootstrap
Interested in digging deeper on A/B testing and experimentation? We’ve got you covered:
- Learn more about A/B testing and A/B/n testing
- Dig deeper into multivariate testing
- And finally, learn how to branch by abstraction with feature flags
If you’re looking for more great content like this, we’d love to have you follow us on Twitter @SplitSoftware, and subscribe to our YouTube channel.
Switch It On With Split
The Split Feature Data Platform™ gives you the confidence to move fast without breaking things. Set up feature flags and safely deploy to production, controlling who sees which features and when. Connect every flag to contextual data, so you can know if your features are making things better or worse and act without hesitation. Effortlessly conduct feature experiments like A/B tests without slowing down. Whether you’re looking to increase your releases, to decrease your MTTR, or to ignite your dev team without burning them out–Split is both a feature management platform and partnership to revolutionize the way the work gets done. Schedule a demo to learn more.
Get Split Certified
Split Arcade includes product explainer videos, clickable product tutorials, manipulatable code examples, and interactive challenges.